Managing Clients in Custody X Change
In Custody X Change, you can store information for an unlimited number of clients, plus give clients a free account to collaborate.
Updating a client's settings
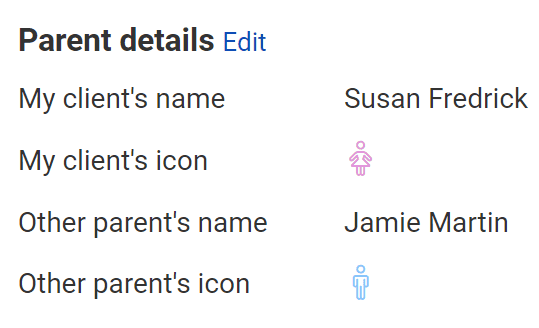
In client settings, you can update basic information for a client, such as their case number, location and co-parent's name.
When you create a new client, the app brings you to their settings page.
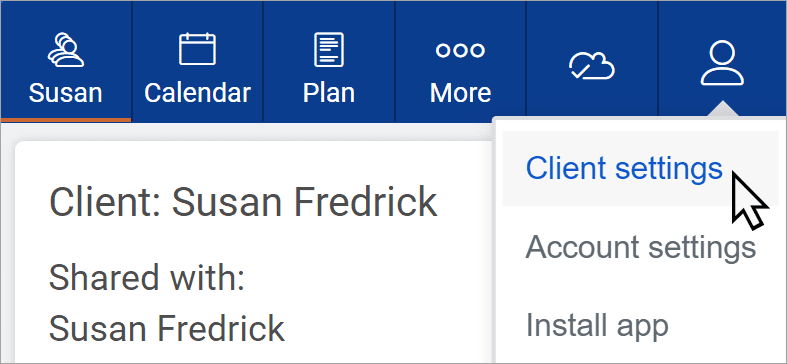
To get there later, select the client from your client list. Then click the person icon at the top right of your screen, followed by "client settings."
Sharing with clients
Sharing sends your client an invitation to link accounts so you can collaborate in real time — and new users get a free one-year subscription when they accept.
Clients can also initiate sharing. As long as they subscribe, you won't have to subscribe to work on their case.
One way for you to share is to enter the client's email address when you create the client. Another way is to select an existing client, then click the blue "share" link to the left of your client list (or above it on a phone).

When the client accepts your invite, your two accounts will be linked, and you'll see "shared" next to their name.
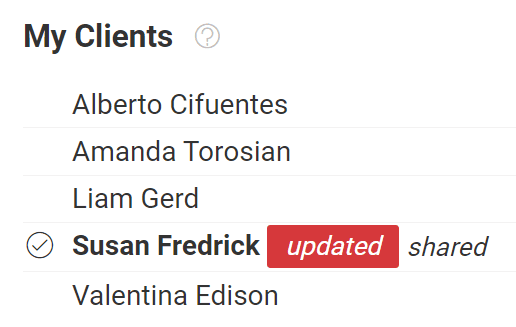
A red "updated" icon will appear next to a linked client's name when the client — or an account linked to theirs — updates their:
- Calendar
- Child info
- Activities
- Messages
- Expenses
To see what was updated, click the client's name, then the bell icon at the top right of the app.
To unshare, click the client's name in your client list. Then hit "unshare" on the left side of the page (or at the top of the page on a phone). You'll both keep the data you had, but you'll no longer see each other's updates. (However, if they initiate unsharing, you will lose their data.)
