Using Multiple Custody Calendars
You can have more than one calendar in Custody X Change. This is helpful if you're creating drafts or if your children follow different parenting schedules.
Creating additional calendars
Custody X Change automatically creates your first calendar when you open an account. To add additional calendars:
-
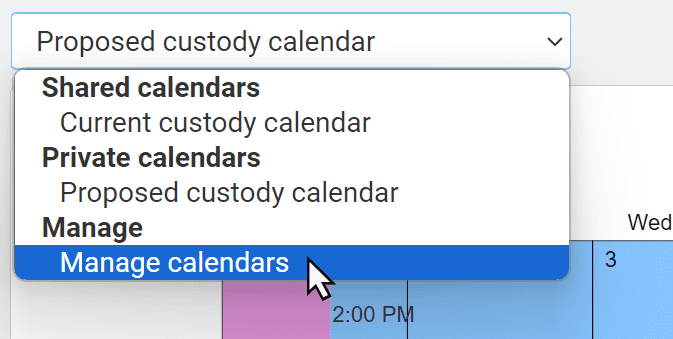
Click the name of your calendar (above the calendar's top left corner).
From the drop-down menu, select "manage calendars."
-
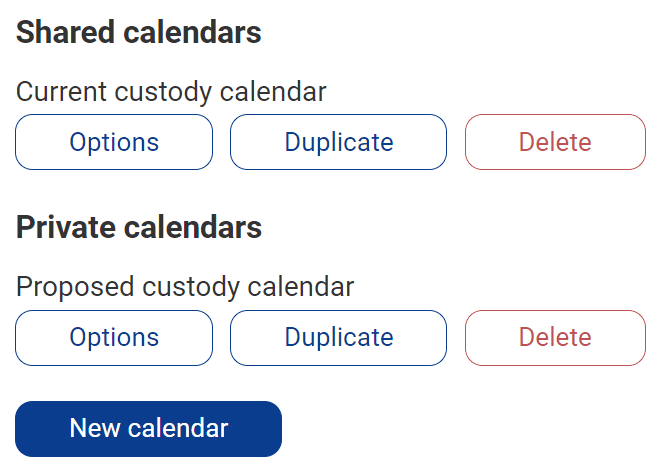
You'll land in your calendar management console.
Click "new calendar" to get started.
-
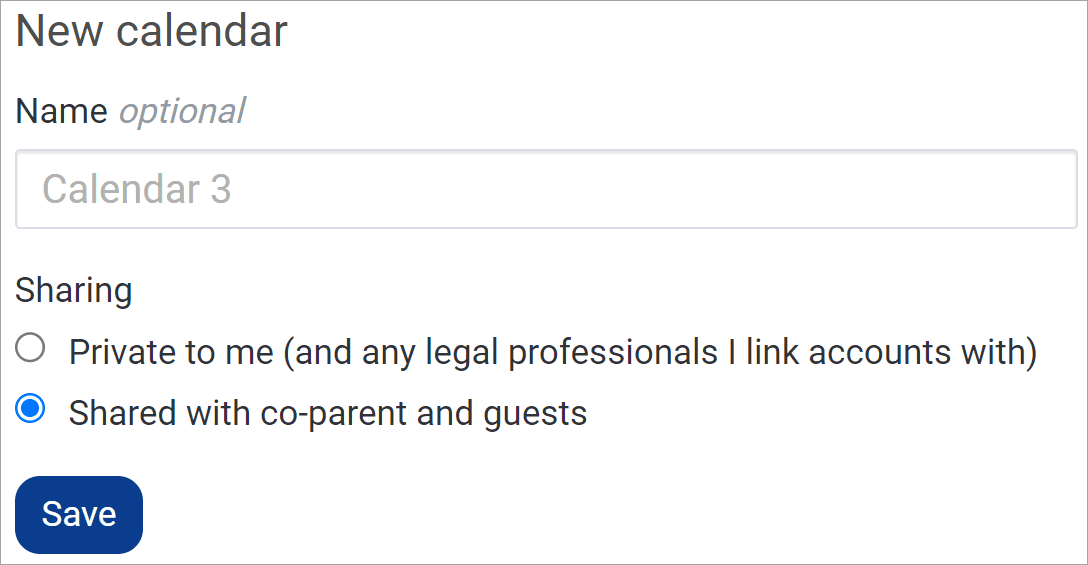
A box will appear for you to enter a calendar name. If you don't enter a name, the app will apply one automatically ("Calendar 1," "Calendar 2," etc.).
You can choose whether to share the calendar with people you link accounts with.
You can start with a blank calendar or an existing calendar. Duplicating an existing calendar is a quick way to start making a variation of it.
-
As soon as you hit "save," your new calendar is ready and open for you to work on.
Moving between calendars
To change which calendar you're working on or viewing, follow Step 1 above. Instead of clicking "manage calendars," select your desired calendar.