Make a Schedule Quickly With a Template
In the steps below, you'll choose a schedule template and adjust it for your family.
If you'd rather, you can create a schedule without a template (manually). Some people prefer that independence, particularly if they're making an unusual schedule.
Before you start, consider the 13 factors that determine your best schedule.
Step 1: Choose dates
If you don't have a schedule entered yet, select "choose a template" (beneath or left of your calendar).
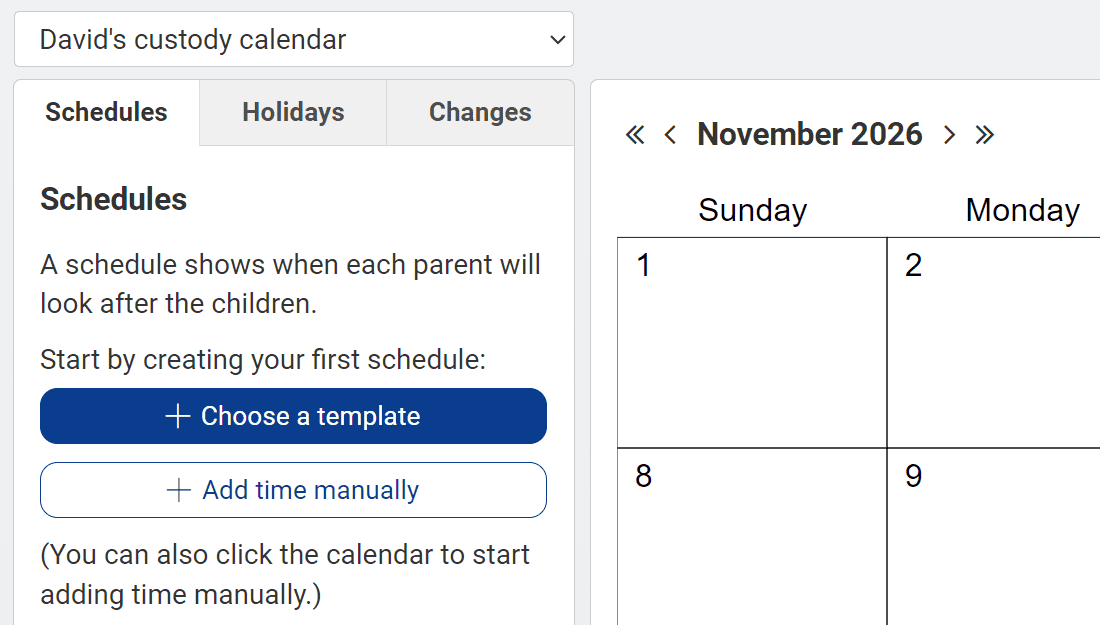
If you already have a schedule entered, select "add schedule."

On the next screen, choose the date range:
Begins. Every schedule must have a date when it takes effect. You might choose today, the first day of next month, or a particular day of the week. Your schedule can continue "forever" (i.e., until your child grows up or until further notice).
Ends. If you choose an end date, you have a seasonal schedule. Your regular schedule (if any) will resume when the seasonal schedule ends.
Repeats annually. A seasonal schedule can repeat every year (useful for school breaks).
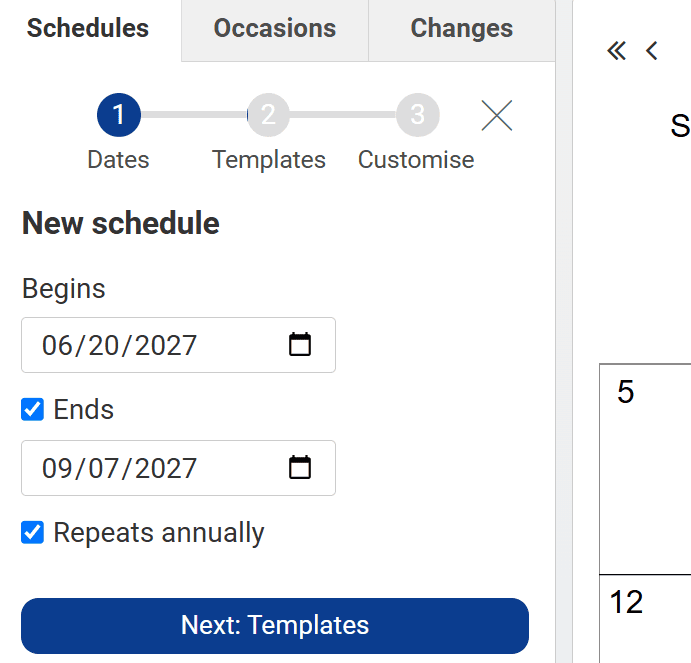
When you're ready to move on, hit "next."
Step 2: Select a template
Choose the template that's closest to the schedule you had in mind. You'll be able to customize it by adding visits, changing dates, swapping each parent's days and more.
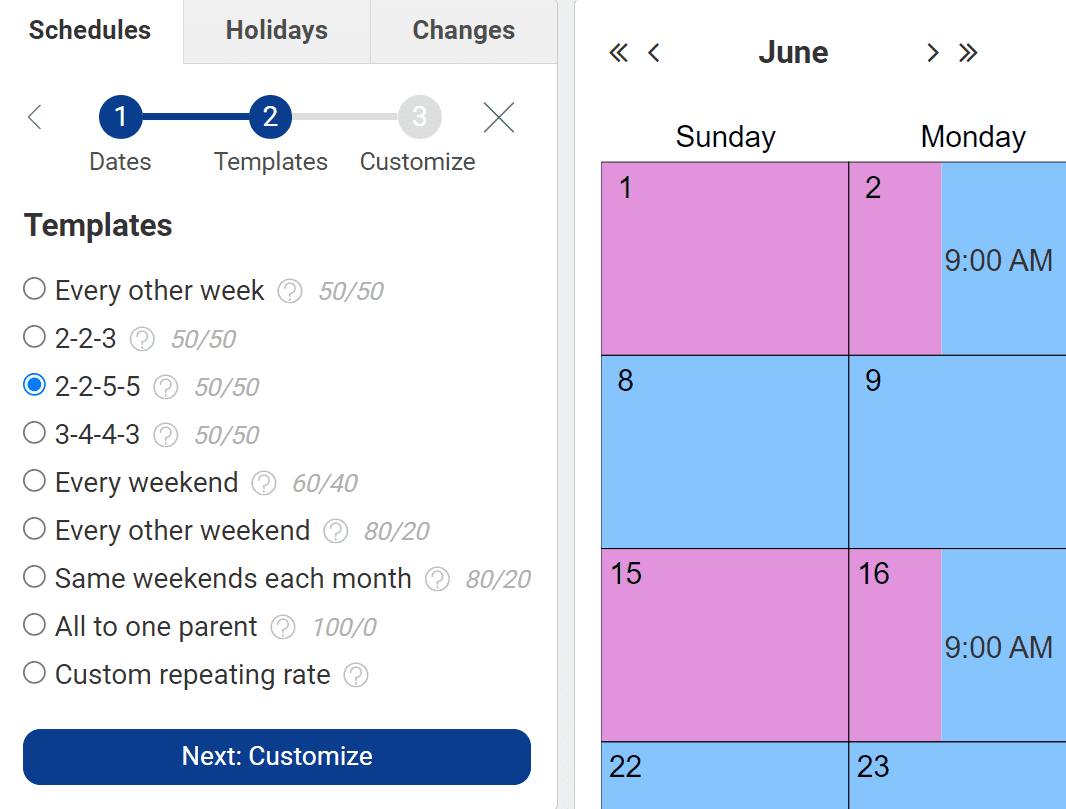
The templates address the most-common parenting schedules. Each name represents a repeating pattern of days (e.g., 2-2-5-5). Next to that, you'll see the percentage of time that pattern gives each parent (e.g., 50/50, meaning each parent has the child 50% of the time).
When you choose a template, the pattern appears in the calendar as a starting point for you to edit.
To move to the next step and begin customizing, click "next."
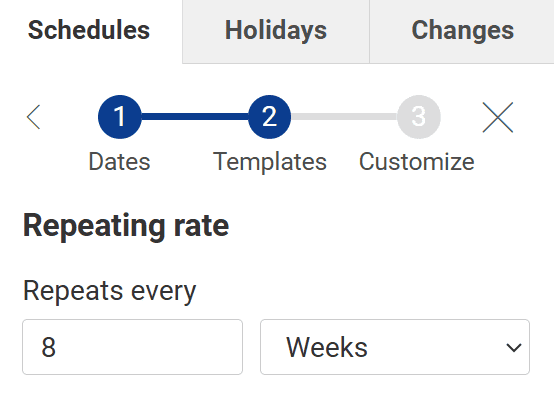
Custom repeating rate
If none of the templates are similar to what you want to create, select "custom repeating rate" near the bottom of the list.
When you hit "next," the app will ask how often your schedule should repeat — in other words, how long it will take for both parents to complete one visitation period with the child. You can count in days or weeks.
For example:
- If the child will live with one parent for five days, then with the other for four days, enter nine days as your repeating rate.

- If the child will live with each parent for four weeks at a time, enter eight weeks as your repeating rate.
Step 3: Customize your schedule
In this step, you can adjust the template you just selected. Wait until you're all done customizing to click "save" — it will close the customization box.
Your options depend on your template. You might see:
- Swap parents: Give all of one parent's time to the other parent (and vice versa). For example, instead of Mom getting Sunday through Tuesday, Dad would.
- Shift week: Move the schedule by a week. For example, instead of Dad having three days in Week 1 and four in Week 2, he'd have four days in Week 1 and three in Week 2.
- Monthly weekend options: Set whether a parent has custody the first, third and fifth weekends of a month or the second, fourth and fifth weekends.
- 5th weekend alternating: When a month has a fifth weekend, will you alternate who gets it? Many parents do to keep their number of weekends roughly equal.
- Weekend's month determined by: When a weekend spans two months, this day will determine whether it counts as the fifth weekend of one month or the first weekend of the next month.
For nearly every template, you'll see "add or extend a visit."
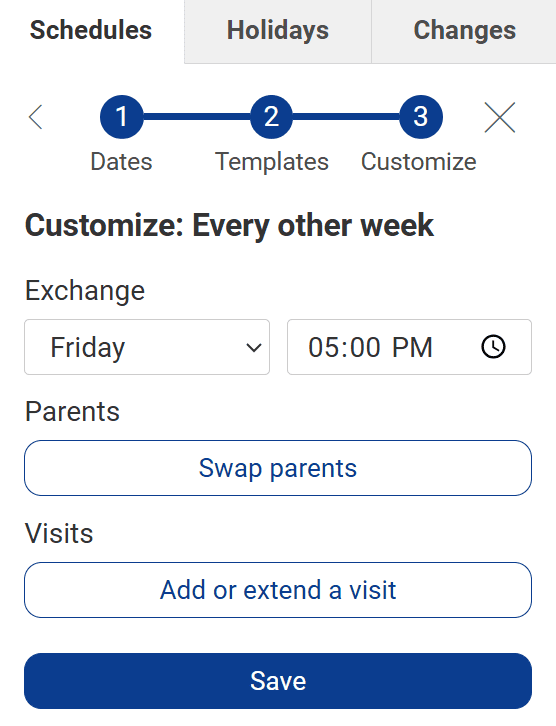
Click it to add a repeating visit. (To add a one-time visit or a visit for a holiday/occasion, wait until Step 4.) Choose which parent this visit will be with, or choose "3rd party" when your child won't be with either parent. Next, enter when the visit should start and end, and set when it will repeat: how often and on which days of the week.
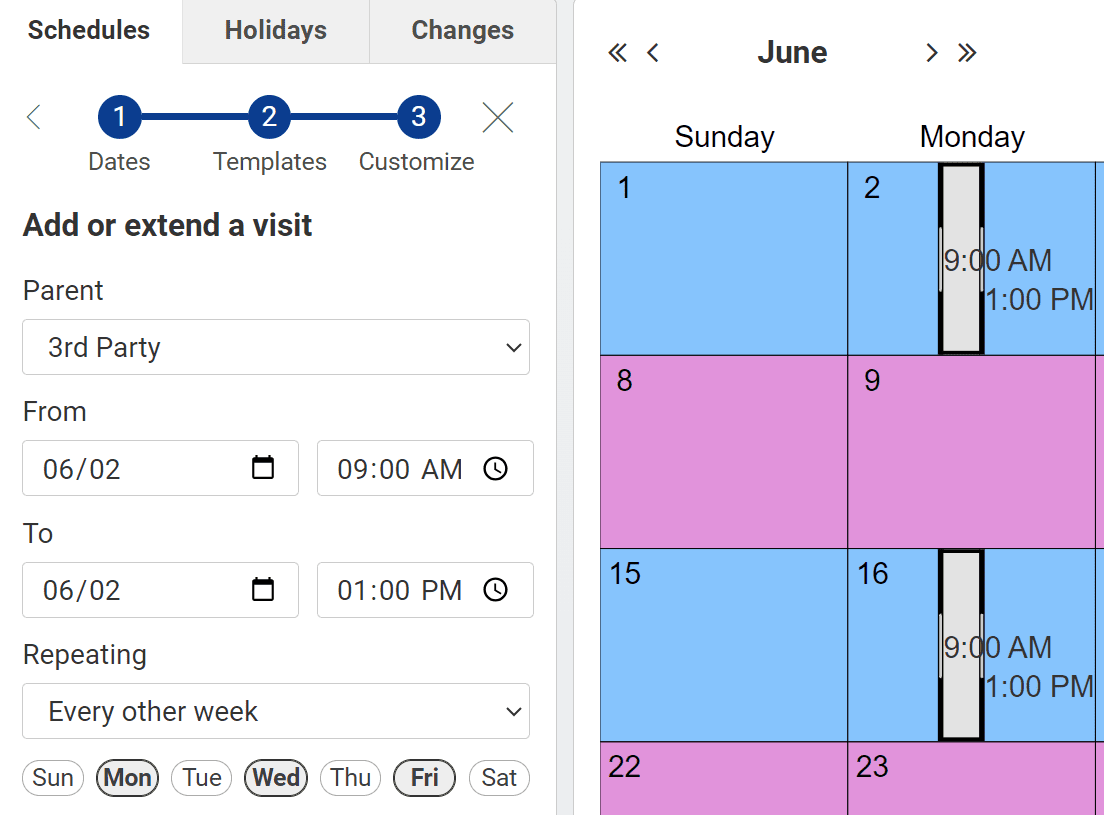
You'll do the same thing to extend a repeating visit you see on your calendar. Either create a visit that abuts the too-short visit, or create a longer visit on top of the short one. For example, to give Dad an extra couple hours with the kids, you could create a two-hour visit right before his original visit.
Step 4: Edit and share your schedule
Once you save, you'll return to the main schedules page.
The app titles your schedule automatically: "Schedule 1," etc.
From here, you can add visits for holidays and annual occasions and, if necessary, edit your schedule. When you edit it, you can title it as you wish.
If you know you'll need a different schedule in the future — perhaps when your child reaches a certain age or during summer break — you can repeat the steps above to make additional schedules and choose the date when each will take effect.