Categorize & Filter Your Expenses
To pull up particular expenses in Custody X Change, you can filter by things like category, date and who paid.
Then, click the "reports" button to print your expense report or export it to PDF, Word or Excel. Use the report to invoice the other parent, or present it in mediation or court.
Categorizing
When you enter an expense, assign it to a category. This is optional but will help you stay organized. Each expense can only be assigned to one category.
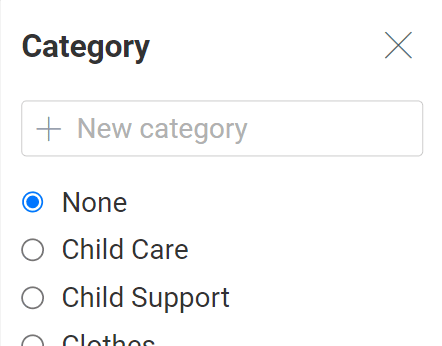
Some categories are built-in. In "edit categories," you can customize:
- Add categories based on reasons you're likely to filter or print (like to see what you've spent on college applications). Don't make a category for only one expense.
- Delete categories you don't expect to use.
- Set a percentage split for each category (e.g., 60/40). The app will automatically suggest it for future expenses in that category.
Filtering
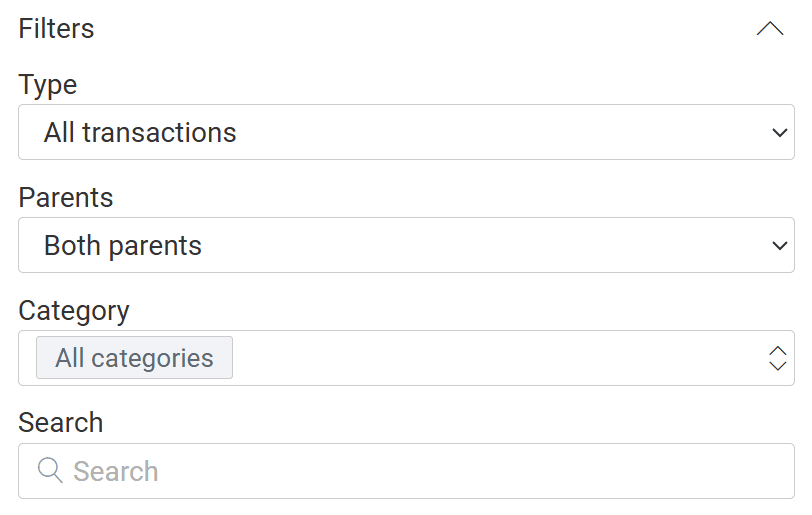
Which expenses you view
To filter which expenses you see, or to search by keyword, make sure the "filters" box at the top of your expenses home page is expanded. (If it isn't, click the down arrow to the right.)
Which expenses you print
To filter which expenses you export or print, first click the "reports" button at the top of your expenses home page.

From there, it's common to choose an "unpaid" report to filter to expenses that haven't been reimbursed yet.
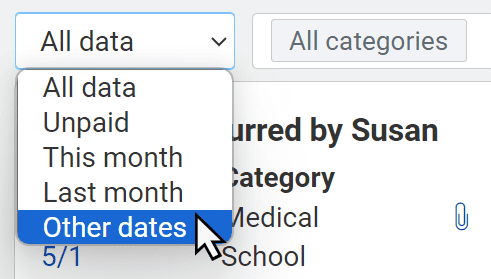
Or you might filter by date range. "This month" and "last month" are ideal if you send the other parent a statement each month. You can choose different dates in "custom report."
If you select "custom report," you get lots of options. For instance, you can choose one or more expense categories. You'll also see these checkboxes:
- Approved: View expenses that were not declined
- Declined: View expenses a parent has refused to reimburse (useful to show how often a parent is refusing to pay)
- Non-reimbursable: View expenses that only the parent who paid was responsible for (useful to show what you spend beyond shared costs)
- Received: View successful payments
- Unreceived: View payments that never made it to the recipient (useful to show how often a parent is claiming to send money)