Adding, Deleting or Renaming Child-Info Forms
The Custody X Change child-info tool comes preloaded with 11 forms per child.
Each form is a space for you to store your children's information on a certain topic: extracurriculars, friends/contacts, IDs and more.

You can add your own forms, plus delete or rename existing ones. These changes will apply to all your children.
Another option you have for customizing the child-info tool is adding, deleting or reordering the fields within a form.
Adding custom forms
-
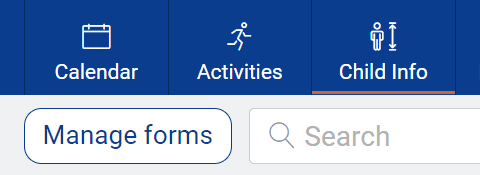
Click "manage forms" at the top of the child-info home screen.
-
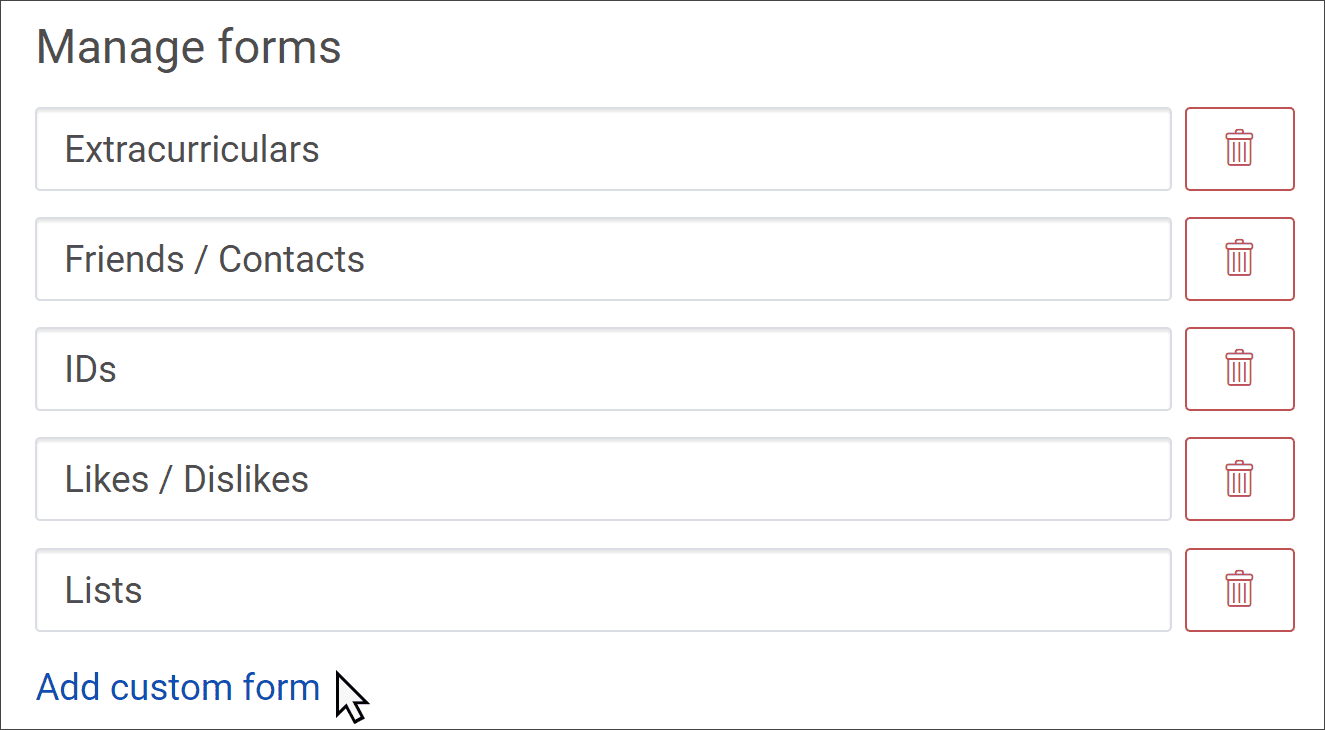
At the bottom of the manage forms screen, click "add custom form."
-
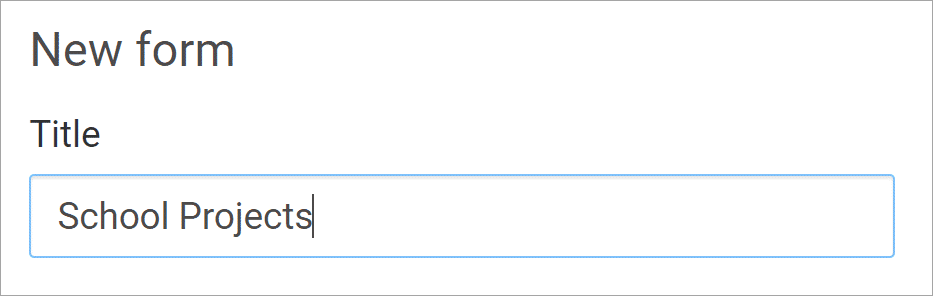
On the next screen, give your new form a title (e.g., "Feeding Schedule" or "School Projects").
-
Then choose whether you want all the information on that topic to appear in a single entry or in multiple entries.

For instance, for a feeding schedule, you would probably use a single entry because your child will only follow one schedule at a time. This is how forms like "Medical Data" and "Likes/Dislikes" work.
On the other hand, for school projects, you would probably want multiple entries so that each project can have its own screen. This is how forms like "Friends/Contacts" and "Lists" work.
-
Next, select the icon that best illustrates your topic.
-
Once you click "save," you'll tell us more about how the form should look. What fields should appear for each parent to type information into? How much room should each field get? Use the plus button to add additional fields.
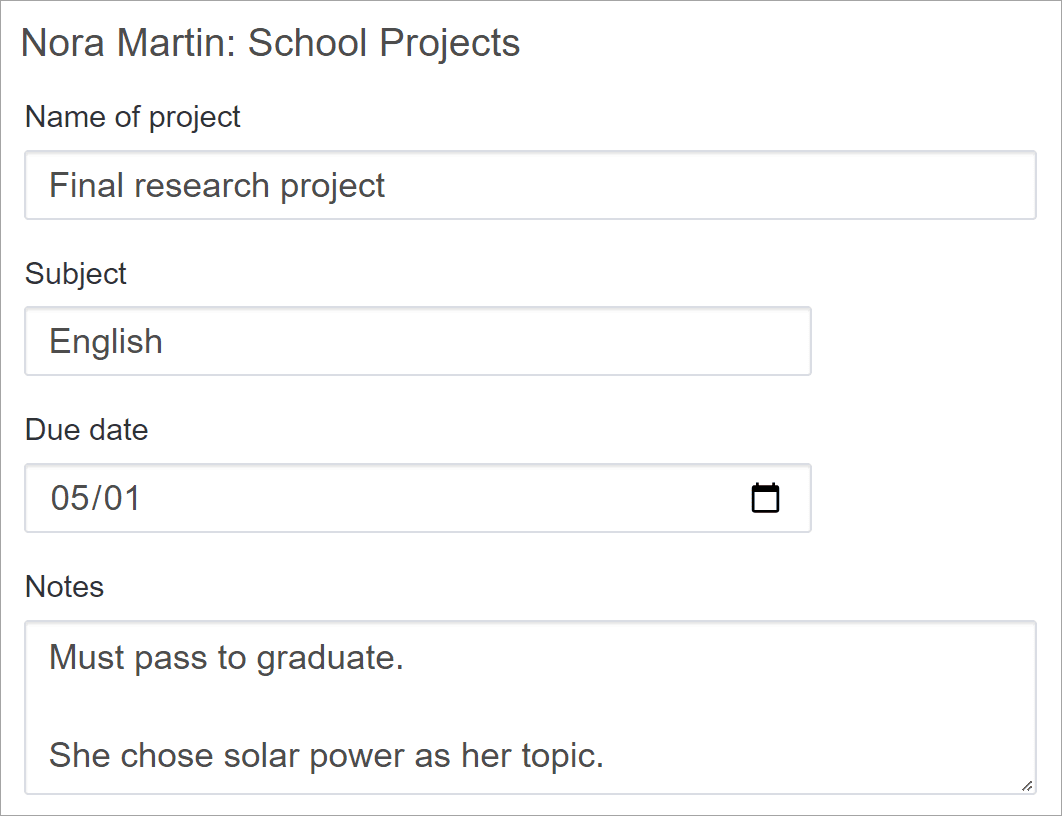
If you want your form to look like the one below, choose:
- Name of project (full-line)
- Subject (half-line)
- Due date (date)
- Notes (multi-line)
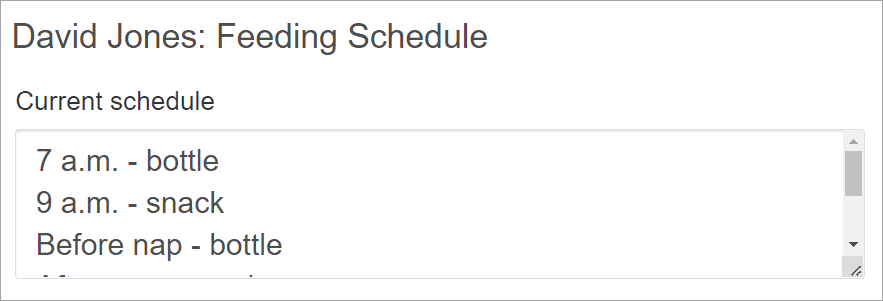
If you want your form to look like the one below, choose:
- Current schedule (multi-line)
-
Click "save" when you're done. Your new form will appear on the child-info home page under each of your children's names. The forms will be in alphabetical order.
If you need to, you can adjust the fields you entered — or delete or rename the form.
Deleting forms
-
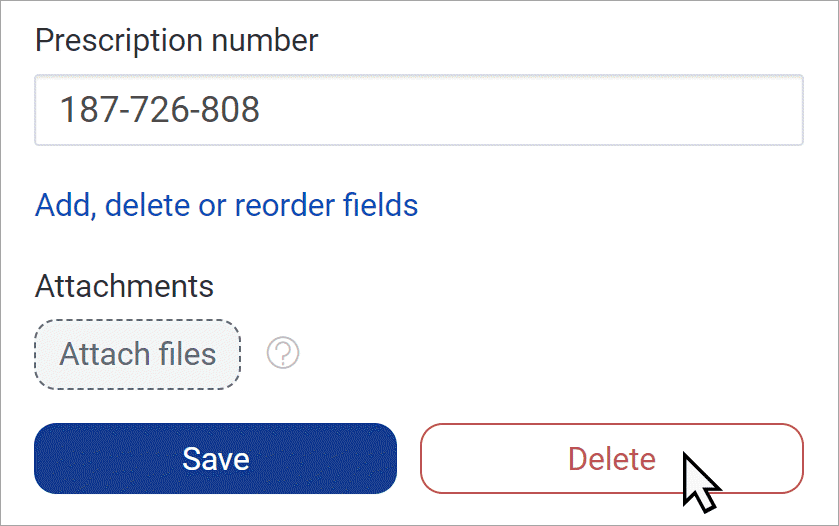
If the forms you want to delete have information in them, go into each one and click the red "delete" button at the bottom to remove the information. Do this for each of your children.
-
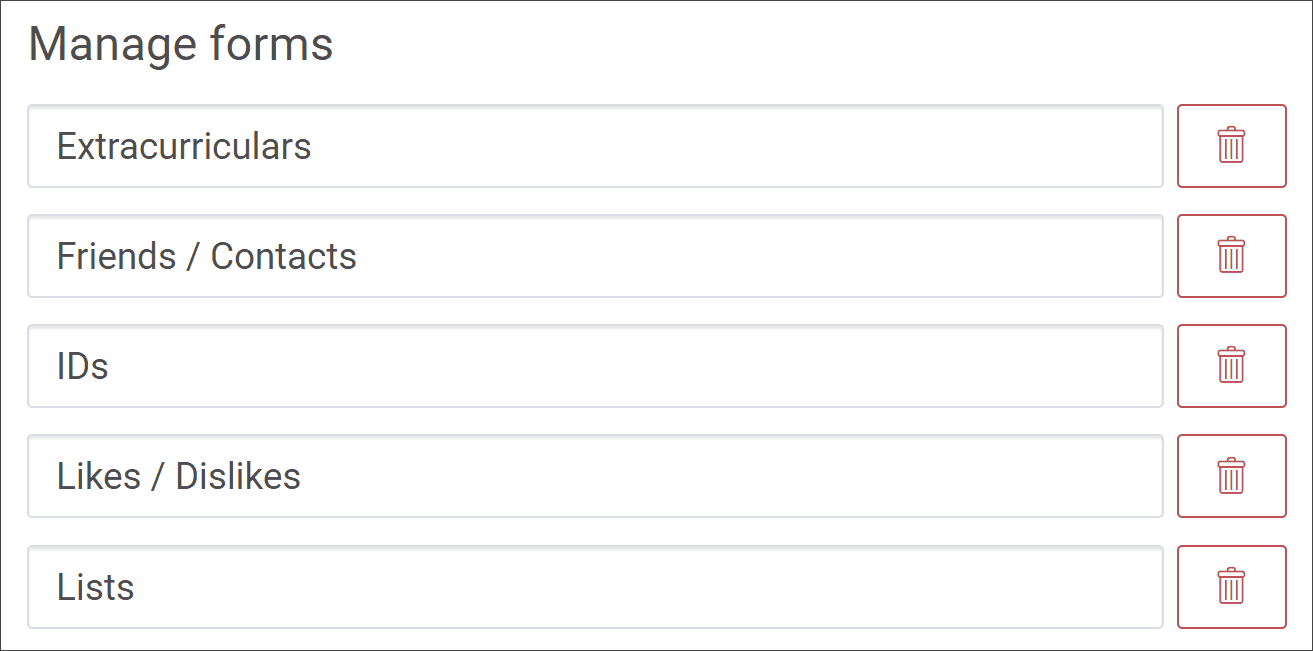
Click "manage forms" at the top of the child-info home screen.
-
When a list of forms appears, click the red trash can next to each form you want to delete.
Should you change your mind, you can restore a deleted form by clicking the plus button that appears in place of the trash can.
-
When you're done deleting forms, click "save."
Renaming forms
-
Click "manage forms" at the top of the child-info home screen.
-
When a list of forms appears, highlight the title you'd like to change, and type a new one in its place.
-
When you're done renaming forms, click "save." The new titles will appear on your child-info home screen in alphabetical order.