Tracking Expenses: Overview
The Custody X Change expense tracker helps you keep tabs on your child-related spending so you can get reimbursed for costs shared with the other parent.
It's available to gold-level subscribers.
More expenses help articles
Who can see your expenses
If you link accounts with your co-parent, you'll each get notified when the other makes a change in the expense tracker.
You can't edit an expense or repayment your co-parent enters, but you can mark that you disagree.
If you link accounts with your lawyer, they can create and print expense reports for you.
Anyone else you link with, like your child, will not see your expenses.
You don't have to link accounts with anyone to use expense tracking. Even if you use Custody X Change alone, you'll be able to enter expenses for both parents and print or email invoices.
Applying repayments to specific expenses
When you enter a repayment, you have to choose whether to put it toward specific expenses.
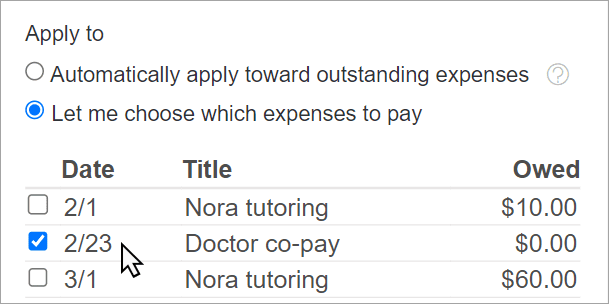
If you decide to do that, specify which expenses by checking them. As you check expenses off, the amount owed for each one will update to show that the repayment has been applied.
If the expenses you check total more than the payment, the payment will be applied to the oldest of those expenses until it's used up.
Expense-tracking tips
- Focus on the expenses you split. Most parents only enter expenses their parenting plan has them split. You could also enter routine costs like clothing, but these are generally addressed by child support.
- Include details so there are no questions. You can give a description, enter a reference number, upload an image, and more.
- Use categories to stay organized. Categories help you print focused reports. Items with the same percentage split (e.g., 50/50) may belong in a category together, but items with different splits probably don't.