Professional Groups in Custody X Change
When multiple professionals in an office use Custody X Change, a professional group helps them work together and stay organized.
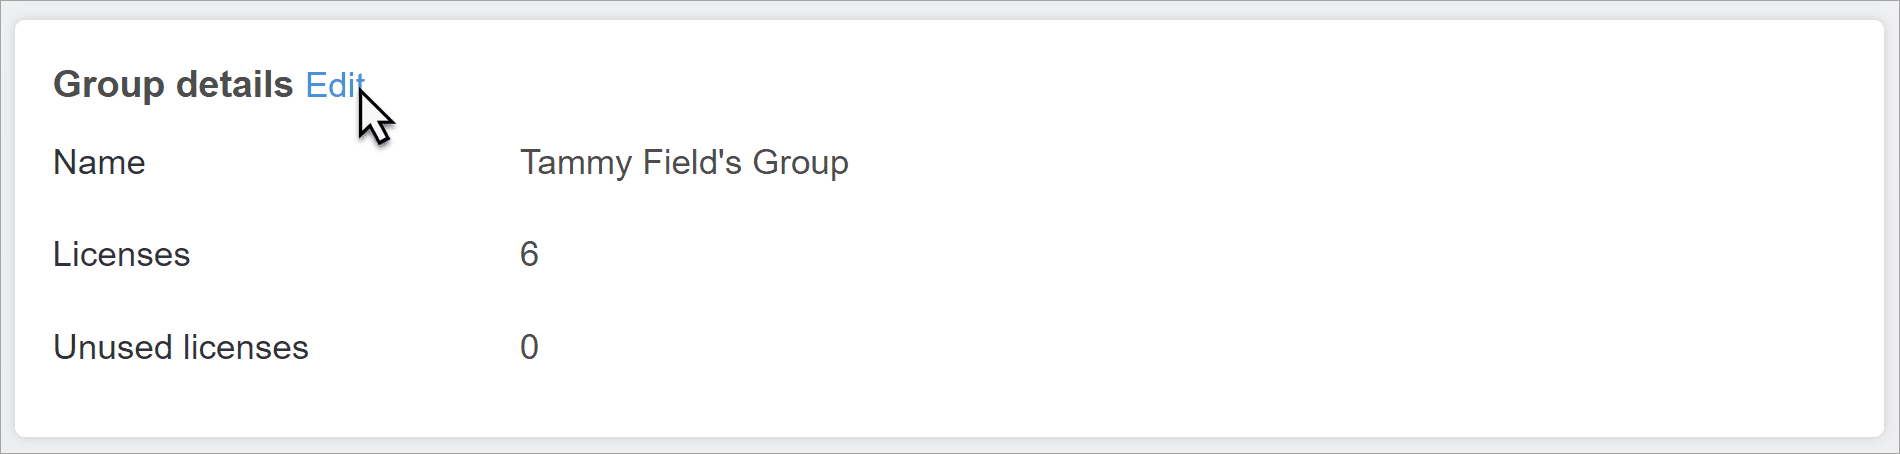
To get to your group overview, first go to your account settings.
Find the "group details" section, then click "edit."
Purchasing licenses
Each group member requires one Custody X Change license, except billing-only members.
On the group overview page, admins and billing members can see the group's total number of Custody X Change licenses, including the number that are unused.
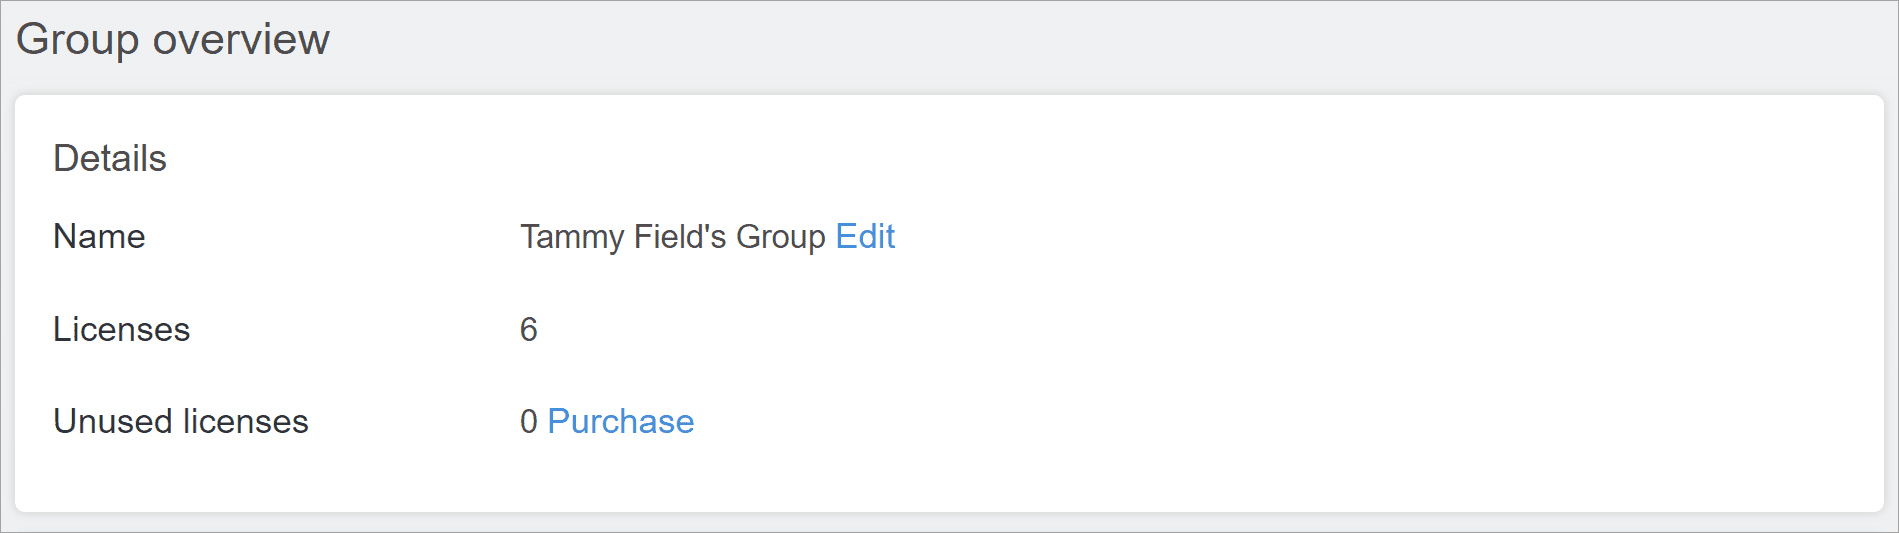
To purchase licenses, click the button next to "unused licenses."
On the billing page, indicate how many licenses you want to buy. Each one is 50 percent off the regular subscription price. All group members get the same subscription level (except free, billing-only members).
You can assign a license (by inviting a new group member) up to one year after its purchase date. If you haven't assigned it by then, it will disappear, and you won't be charged to renew its subscription.
Inviting and removing members
Group admins and billing-only members can manage membership.
Before you invite new members, make sure the group has at least one unused license for each of them. If it doesn't, you'll need to purchase licenses (directions above).
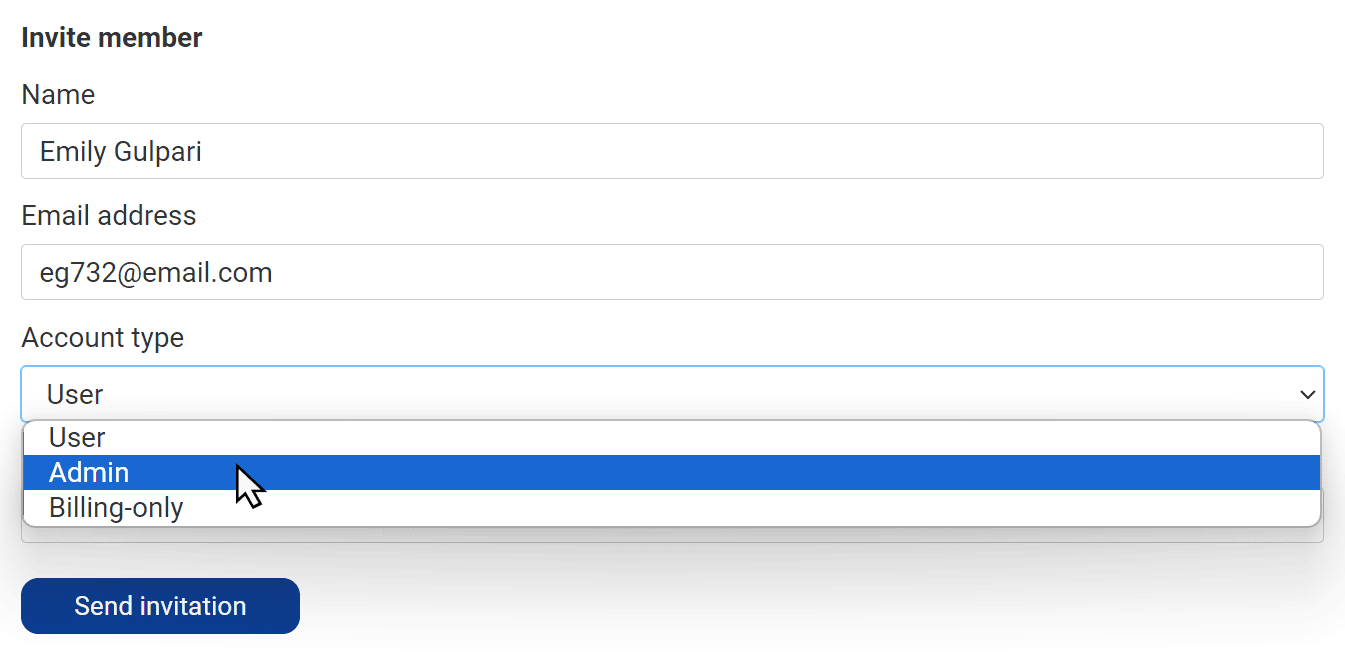
In the "invite member" section of your group overview, enter the professional's name and email address. (An email address that has a Custody X Change parent account won't be able to join.)
Then, select the account type to assign to them:
- User: Can work on everyone's clients.
- Admin: Can work on everyone's clients. Can manage group members and assign clients. Gets billing receipts if there's no billing-only member.
- Billing-only: Cannot work on clients. Can manage group members. Gets billing receipts. Only sees account settings pages (including the group overview), not other app features. Does not take up a license.
The invitee will receive an email with a link to join the group. If they don't have an account, they'll be prompted to create one.
As soon as a member joins, their client data becomes accessible to the other group members. The group is billed for their subscription going forward.
To remove a group member, click the trash bin next to their name. If they have clients assigned, you'll choose whether the group should keep the client data. If the group keeps it, you'll be able to reassign the clients once you remove the member. Removing a member restores the license so you can assign it to someone else.
Assigning clients
With a pro group, members can work on each other's clients (unless you're a billing-only member).
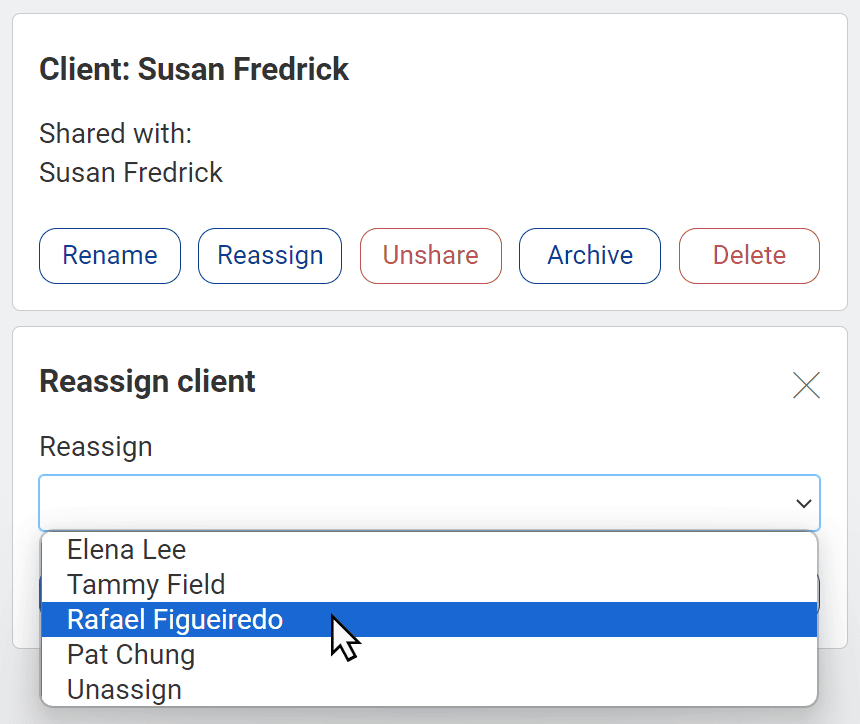
Any admin or regular member can assign a client to themself by selecting the client, then clicking "assign to myself." Admins can also reassign clients to other members by choosing "reassign."
When a member links accounts with their client, "shared" appears beside the client's name in the client list.
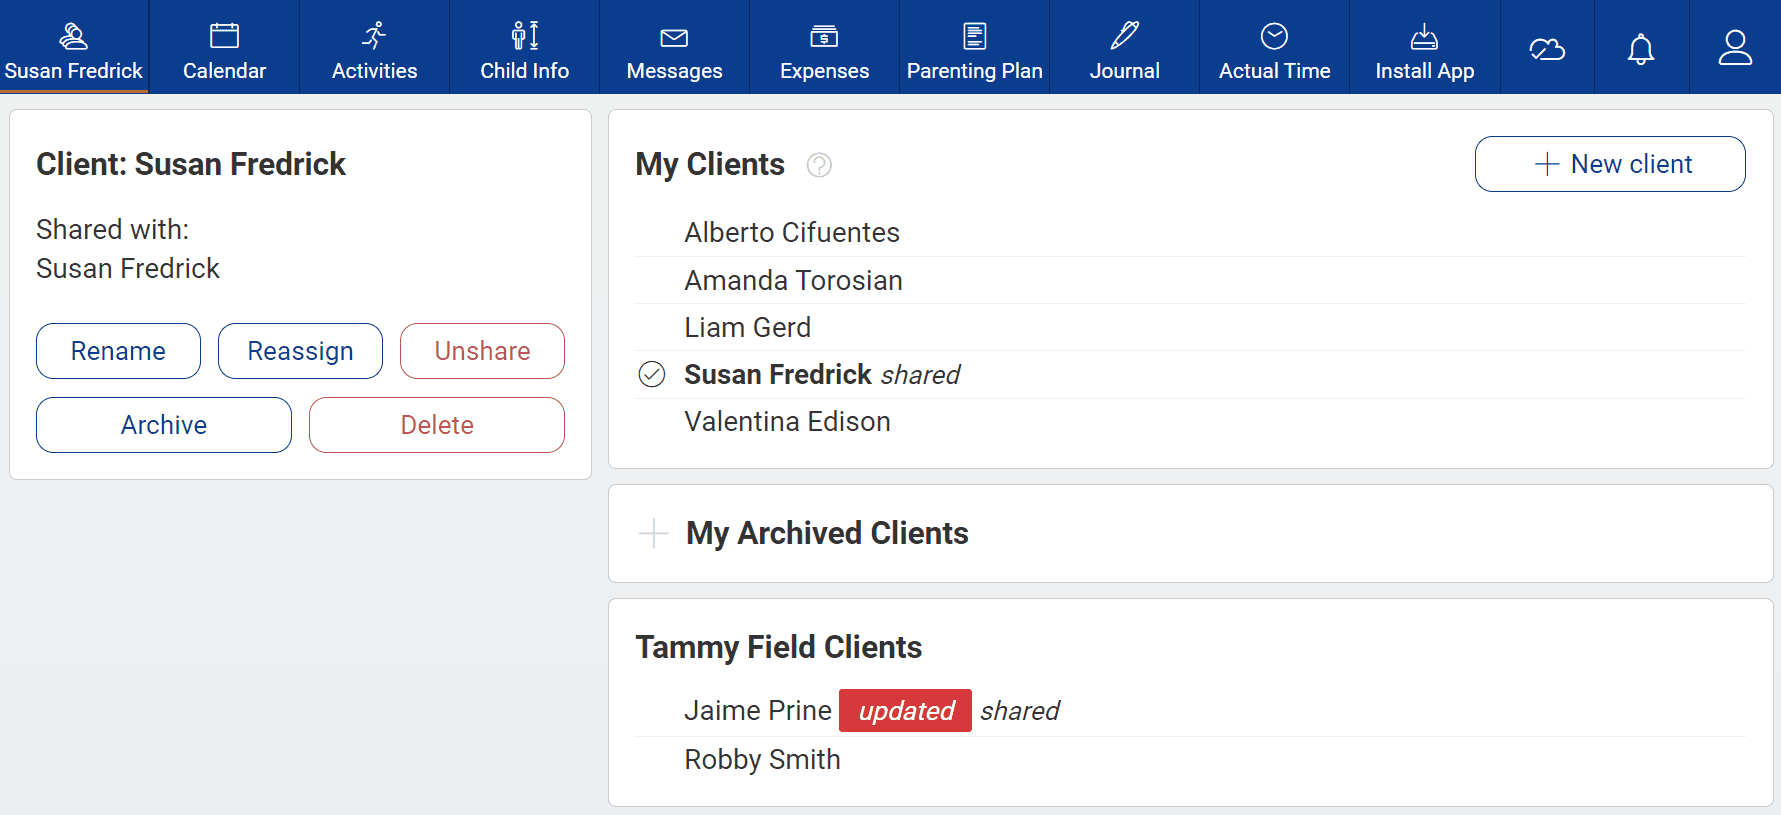
You will only get alerted when your own linked client makes updates. However, you can see the activity of linked clients who belong to other group members. Select the client, then click the notifications bell at the top right of the screen.